

FREE – Violin, music related preparation for etching
October 30, 2017
FREE – St. Anthony of Padua, preparation for etching
June 14, 2018How To Properly Scan a Photograph
We were pretty busy in the past period. Alongside regular jobs, we have several new clients with whom we started cooperation, and we intervened on the project to which the deadline was close, so we jumped in to help. So, we were fully utilized and exhausted in the end. During these periods, the rational time consumption is of crucial importance, but ultimately it is worth it – time is money. Over time, we have become real masters in quality organization of time. However, it often happens that others unconsciously (or unknowingly) make all our effort worthless. We are talking about the images we get for processing.
Most of our partners we cooperate with gets the pictures from their clients which are then forwarded to us for processing. These pictures are usually quality photographs because, of course, families want a good memorial photo. However, while scanning / cropping photos, with at least 50% of the cases easily avoidable mistakes are made. This post is intended for everyone making these mistakes. All of you who don’t make these mistakes already know that this doesn’t apply to you.
How to properly scan a portrait / photo?
The following lines apply to every photo scanning or cropping that will be sent for further editing and processing. If we follow these simple steps, we will surely get a better picture, a better-quality product, and all of it in a short period of time.
Photo scanning
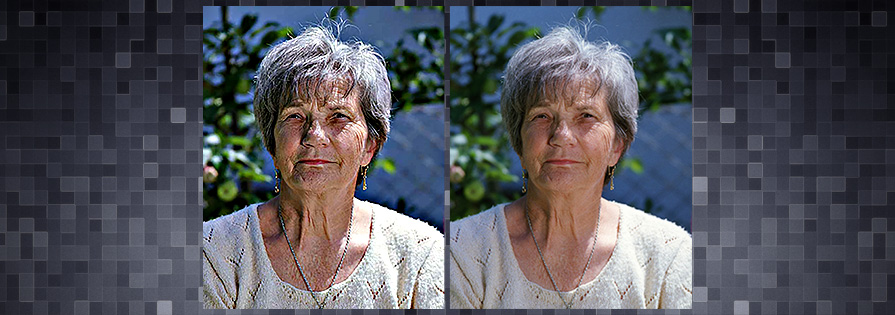
While scanning a photo, make sure that the surface of the glass on which the photo is placed is clean. Even the tiniest grains of dust can cause an unpleasant stain on the face that does not actually exist in the photo. The same goes for hair, grease, and scratches on the glass. It’s enough to gently brush the glass surface several times until you are sure it’s really clean. After scanning, make sure that the scanned digital image is really as clean as the original photo. It is desirable to do this with each new scan. Also, always remove all the filters and effects on the scanner that may have stayed on from the previous scan.
Cropping the portrait
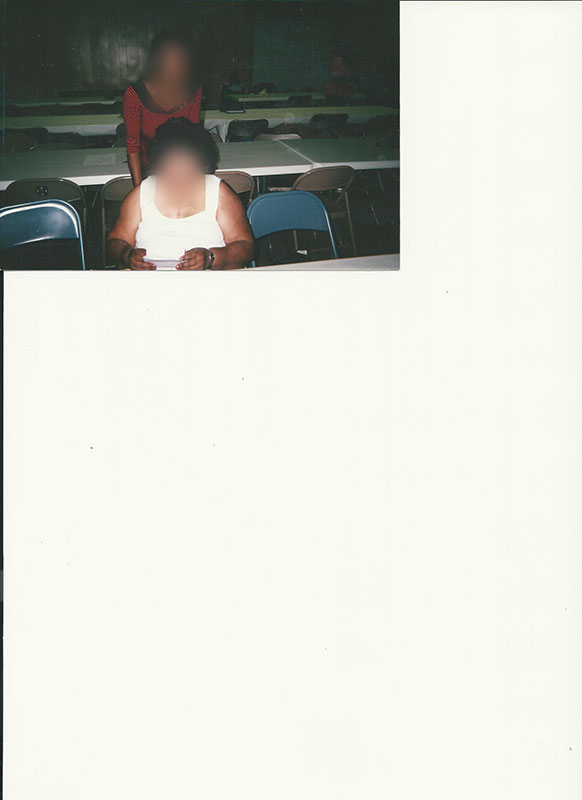
The photograph being scanned is usually much smaller than the surface of the scanner. However, people occasionally find it necessary to scan the entire scanner’s working area. This, of course, is not necessary. In order to save time and space on the disk, and get better quality at the same time, just crop the photo ONLY. When it is necessary to process the entire photograph, e.g. landscape, only photograph is sufficient, there is absolutely no need to send us all the blank space around the photo, or the entire surface of the scanner.
The main part of our offer is the portrait processing for memorial photos. Clients however often do not have a studio portrait photo, but they send us whole amateur photo with many people in it, with unnecessary space around the person whose portrait is required. In this case, just crop the narrow area around the person from which the portrait will be created. There is no need to spend pixels and MBs on, for example, the car next to the person, if there is no need to process the car, and so on. In this way, not only you save space and time, but correct cropping is useful for the quality of the scanned digital photograph. More on this in the text below.
Resolution
Every digital file that is sent to printing or engraving needs to satisfy the needs of the equipment that will process it. When it comes to printing photos for making ceramic pictures (like with every other quality printing), these files are processed at a resolution of 300dpi. The same applies to laser etching. This means that the final file we deliver must be at 300dpi resolution. The problem can appear when we get a picture that is very small and 72dpi at the same time. This often happens and then we need to increase its size by x times.
What is this really about? The simplest way to explain it would be that dpi stands for dots per inch (pixel per inch). So, the 300dpi resolution image has 300pixels (dots) per inch. More pixel density means a sharper, clearer, and therefore a better picture. Now, when we get a portrait scanned at 72dpi, it’s usually a very small image and we need to increase its resolution (density of dots) up to 300dpi, as well as the size. For example, from 2x3cm photo we need to get a picture that will go on to 24x30cm ceramic plaque.
This enlargement practically means that where there was one dot, now it has to be four or more dots. All of this is simply performed by algorithms with a single click, but the machine cannot know what the person whose portrait is being enlarged looked like and it will create additional dots that are similar to the nearest ones in order to fill formed gaps of the enlarged picture. The result is usually blurred, sometimes completely useless picture. The more we enlarge, the poorer the picture quality we get. If the image is scanned at 300dpi, this process will be painless. Always scan a photo (cropped area) to at least 300dpi!
The most important
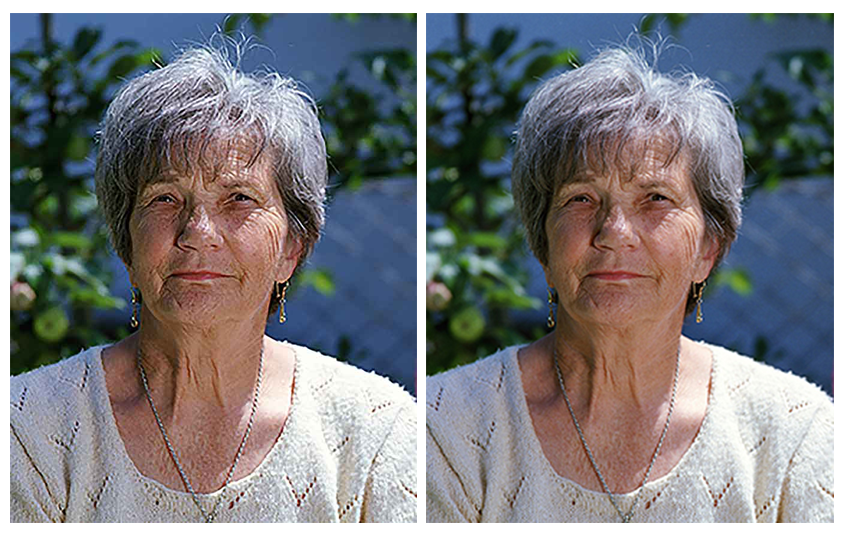
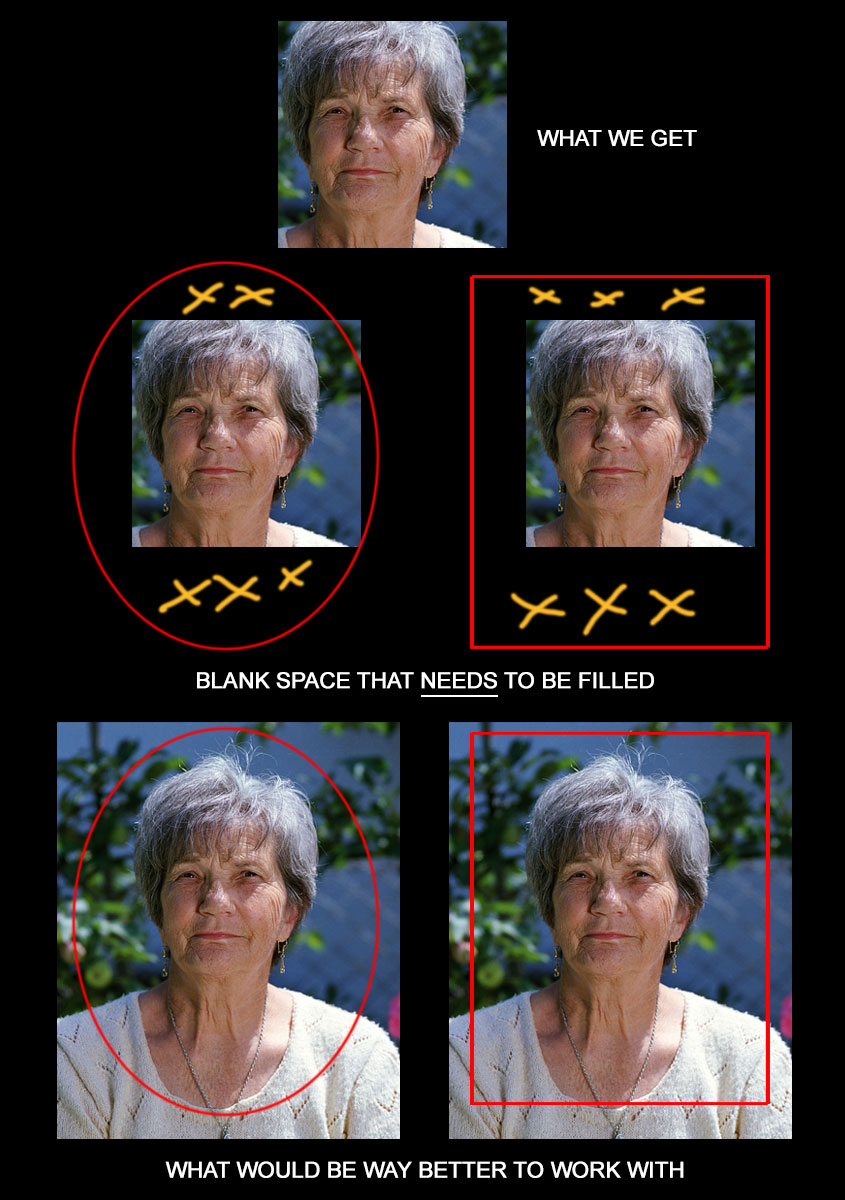
Unbelievably, but not so rarely we get photos that are too cropped. For some reason, almost everything except the person’s face is missing. This picture, of course, cannot be processed, unless we add or draw in all those missing parts of hair, body, clothes to get a suitable picture for the monument. It is doable if there’s not too much of it missing. We regularly add parts of the body, clothes, etc. However, if it is necessary to add 50% of the picture that will go on the memorial photo, it is incredibly risky because we cannot know what the hair outline was like, and the family can find the appearance of a person unnatural and refuse to use the image and maybe even the whole order. The examples below will tell you the best what is it all about. After all, the process of adding missing areas in these pictures lasts forever if we want everything to look very natural, which unnecessarily takes us a lot of extra time, and that brings us back to the beginning of this post.
Amateur touching up
Sometimes families try to improve the picture on their own using various magic tools, automatic web services or even mobile apps. This of course results in additional ruining of already poor-quality image. The experience we have is most likely incomparably greater then theirs, and we will most definitely do a better job with the original picture than with these “touched up” pictures. You can send us such pictures as a reference file, but make sure you always send us the original, unspoiled picture.
Mobile phone pictures
Photos taken with mobile phones are, most of the times, very poor quality for processing. The camera can be bad, and the lightning is almost never good which directly affects the photo quality. If it is still necessary to process these photos, send us the photo from the phone memory, by all means, do not send us a screenshot from the phone display. It is by far the worst possible option, the quality of the camera is completely erased, and picture size and resolution are poor. So, forget about screenshots and try to get transfer of the picture from the phone memory to email or computer.
So, to summarize
If you have the opportunity to scan the photos you send us (or to anyone else), do it in the following way:
- Clean the scanner’s working surface
- Crop only the part of the photo that needs to be processed
- Make sure you haven’t cropped too much. Leave each and every part of the photo that needs to be used
- Set the resolution to at least 300dpi
This will take you one minute, and it can significantly contribute to quality of the final product (ceramic picture, laser etching or whatever) and shorten the processing period in many ways.
The bad photo that we get affects the quality of the memorial picture, and therefore the entire headstone. If you or your clients do not have the opportunity to scan a photo yourself, forget all this and send us what you have. During the 17 years we have processed thousands of such pictures and we guarantee that we will do the best possible job. But if there’s a possibility for obtaining the more accurate photo, please try to do so. We believe that every link in the industry should deliver the maximum quality if we want the perfect final product and satisfied customers. We are pretty sure that we all share the same goal.
